
티스토리 뷰
1. Repository Install
Install EPEL Repository On CentOS And RHEL 7
How to install EPEL for Centos 7
[root@localhost ~]# cat  /etc/centos-release
CentOS Linux release 7 (Broken)
Download EPEL and install using yum:
yum install http://dl.fedoraproject.org/pub/epel/7/x86_64/e/epel-release-7-5.noarch.rpm
Or,
yum install epel-release
Sample output:
Loaded plugins: fastestmirror
epel-release-7-0.2.noarch.rpm                            |  13 kB     00:00
Examining /var/tmp/yum-root-adCP8h/epel-release-7-0.2.noarch.rpm: epel-release-7-0.2.noarch
Marking /var/tmp/yum-root-adCP8h/epel-release-7-0.2.noarch.rpm to be installed
Resolving Dependencies
--> Running transaction check
---> Package epel-release.noarch 0:7-0.2 will be installed
--> Finished Dependency Resolution

Dependencies Resolved

================================================================================
 Package           Arch        Version    Repository                       Size
================================================================================
Installing:
 epel-release      noarch      7-0.2      /epel-release-7-0.2.noarch       22 k

Transaction Summary
================================================================================
Install  1 Package

Total size: 22 k
Installed size: 22 k
Is this ok [y/d/N]: y
Downloading packages:
Running transaction check
Running transaction test
Transaction test succeeded
Running transaction
  Installing : epel-release-7-0.2.noarch                                    1/1
  Verifying  : epel-release-7-0.2.noarch                                    1/1

Installed:
  epel-release.noarch 0:7-0.2

Complete!
Check if EPEL repo Installed:
[root@localhost ~]# yum update
[root@localhost ~]# yum repolist
Loaded plugins: fastestmirror, langpacks
Loading mirror speeds from cached hostfile
 * epel: nl.mirror.eurid.eu
repo id                                                                                           repo name                                                                                                                            status
epel/x86_64                                                                                       Extra Packages for Enterprise Linux 7 - x86_64                                                                                       4,572
repo                                                                                              Updates PRE Release                                                                                                                  8,465
repolist: 13,037
[root@localhost ~]#
Install packages:
Example: Thunderbird.
[root@localhost ~]# yum install  thunderbird
Loaded plugins: fastestmirror, langpacks
Loading mirror speeds from cached hostfile
 * epel: be.mirror.eurid.eu
Resolving Dependencies
--> Running transaction check
---> Package thunderbird.x86_64 0:24.5.0-2.el7 will be installed
--> Finished Dependency Resolution

Dependencies Resolved

=============================================================================================================================================================================================================================================
 Package                                                     Arch                                                   Version                                                       Repository                                            Size
=============================================================================================================================================================================================================================================
Installing:
 thunderbird                                                 x86_64                                                 24.5.0-2.el7                                                  epel                                                  45 M

Transaction Summary
=============================================================================================================================================================================================================================================
Install  1 Package

Total download size: 45 M
Installed size: 86 M
Is this ok [y/d/N]:
Done.
2. nginx + php + mariadb + phpMyadmin 설치
Install Nginx
Nginx (pronounced engine-x) is a free, open-source, high-performance HTTP server and reverse proxy, as well as an IMAP/POP3 proxy server written by Igor Sysoev. According to netcraft web server survey 14.08% web sites are served by Nginx.
Nginx will not be found in the official CentOS repository, so let us install EPEL repository first. To install EPEL repository refer the following link.
Now, install Nginx with following command:
yum install nginx -y
Start Nginx and make it to start automatically on every reboot:
systemctl start nginx
systemctl enable nginx
Stop Apache or any other web servers if you have any:
systemctl stop httpd
systemctl disable httpd
Allow Nginx server through your firewall/router if you want to access the web server from other systems:
firewall-cmd --permanent --add-service=http
systemctl restart firewalld
Now point your web browser with “http://ip-address″. The test page of nginx will open.

Nginx web server has been installed now.
Configure Nginx
Open the file /etc/nginx/nginx.conf and set the worker_processes (i.e No. of CPU’s in your system). To see the no. of CPU’s, use the command “lscpu”.
vi /etc/nginx/nginx.conf
In my case it’s “1″. So I set this as ’1′:
worker_processes 1;
Scroll down and make the changes as shown below.
[...]
server {
        listen       80;
        server_name  server.unixmen.local;
        root         /usr/share/nginx/html;
[...]
    ## Uncomment or Add the following lines

    location ~ \.php$ {
            root           /usr/share/nginx/html;
            fastcgi_pass   127.0.0.1:9000;
            fastcgi_index  index.php;
            fastcgi_param  SCRIPT_FILENAME  $document_root$fastcgi_script_name;
            include        fastcgi_params;
        }

[...]
Save and close the file. Restart Nginx service:
systemctl restart nginx
Install MariaDB
MariaDB is a drop in replacement for MySQL. It is a robust, scalable and reliable SQL server that comes rich set of enhancements.
Now, start installing MariaDB as shown below:
yum install mariadb-server mariadb -y
Start MariaDB service and let it to start automatically on every reboot:
systemctl start mariadb
systemctl enable mariadb
Set MySQL root password
By default, MySQL root password is empty. So, to prevent unauthorized access to MySQL, let us set root user password. Enter the following command to setup mysql root user password:
mysql_secure_installation
/usr/bin/mysql_secure_installation: line 379: find_mysql_client: command not found

NOTE: RUNNING ALL PARTS OF THIS SCRIPT IS RECOMMENDED FOR ALL MariaDB
      SERVERS IN PRODUCTION USE!  PLEASE READ EACH STEP CAREFULLY!

In order to log into MariaDB to secure it, we'll need the current
password for the root user.  If you've just installed MariaDB, and
you haven't set the root password yet, the password will be blank,
so you should just press enter here.

Enter current password for root (enter for none):
OK, successfully used password, moving on...

Setting the root password ensures that nobody can log into the MariaDB
root user without the proper authorisation.

Set root password? [Y/n] y ## Enter Y and press Enter
New password:   ## Enter new password
Re-enter new password:  ## Enter password again
Password updated successfully!
Reloading privilege tables..
 ... Success!


By default, a MariaDB installation has an anonymous user, allowing anyone
to log into MariaDB without having to have a user account created for
them.  This is intended only for testing, and to make the installation
go a bit smoother.  You should remove them before moving into a
production environment.

Remove anonymous users? [Y/n] y  ## Enter Y and press Enter
 ... Success!

Normally, root should only be allowed to connect from 'localhost'.  This
ensures that someone cannot guess at the root password from the network.

Disallow root login remotely? [Y/n] y  ## Enter Y and press Enter
 ... Success!

By default, MariaDB comes with a database named 'test' that anyone can
access.  This is also intended only for testing, and should be removed
before moving into a production environment.

Remove test database and access to it? [Y/n] y  ## Enter Y and press Enter
 - Dropping test database...
 ... Success!
 - Removing privileges on test database...
 ... Success!

Reloading the privilege tables will ensure that all changes made so far
will take effect immediately.

Reload privilege tables now? [Y/n] y  ## Enter Y and press Enter
 ... Success!

Cleaning up...

All done!  If you've completed all of the above steps, your MariaDB
installation should now be secure.

Thanks for using MariaDB!
Install PHP
PHP (recursive acronym for PHP: Hypertext Preprocessor) is a widely used open-source general purpose scripting language that is especially suited for web development and can be embedded into HTML.
Install PHP with following command:
yum install php php-common php-fpm php-mysql -y
Start php-fpm service and let it to start automatically on every reboot:
systemctl start php-fpm
systemctl enable php-fpm
Configure PHP
Open up /etc/php.ini file in any editor. Find the line cgi.fix_pathinfo and change the value from 1 to 0(zero):
vi /etc/php.ini
[...]
cgi.fix_pathinfo=0
[...]
Open up the file /etc/php-fpm.d/www.conf and change the user and group values from apache tonginx:
vi /etc/php-fpm.d/www.conf
[...]
; Unix user/group of processes
; Note: The user is mandatory. If the group is not set, the default user's group
;       will be used.
; RPM: apache Choosed to be able to access some dir as httpd
user = nginx
; RPM: Keep a group allowed to write in log dir.
group = nginx
[...]
Save and close the file. Restart php-fpm service:
systemctl restart php-fpm
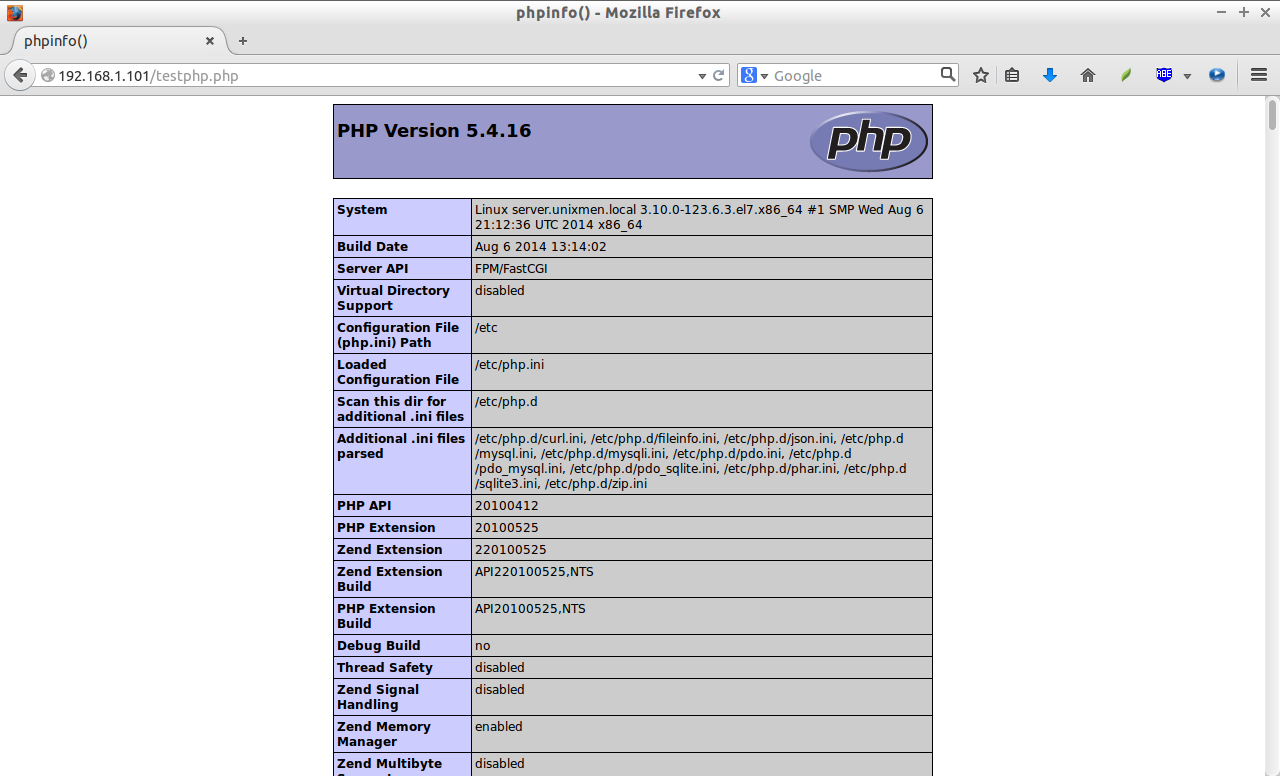
Test PHP
Create a sample “testphp.php” file in web root folder and append the lines as shown below:
vi /usr/share/nginx/html/testphp.php
<?php
phpinfo();
?>
Save and close the file. Restart Nginx service:
systemctl restart nginx
Navigate to http://server-ip-address/testphp.php. It will display all the details about PHP such as version, build date and commands etc.
If you want to install all PHP modules, enter the command yum install php* -y and restart the Nginx service. To verify for the modules, open up your web browser and navigate to http://server-ip-address/testphp.php. You will then see all PHP modules.
PHP-FPM listens localhost (127.0.0.1) via port 9000 by default. If you want to make PHP-FPM to listen to unix socket, follow the steps below. Edit file /etc/php-fpm.d/www.conf,
vi /etc/php-fpm.d/www.conf
Find the following line:
listen = 127.0.0.1:9000
Change the above line as shown below:
listen = /var/run/php-fpm/php5-fpm.sock
Then edit nginx configuration file:
vi /etc/nginx/nginx.conf
Find the following line:
fastcgi_pass 127.0.0.1:9000;
And, change it as shown below:
fastcgi_pass unix:/var/run/php-fpm/php5-fpm.sock;
Save and close the file. Restart nginx and php-fpm service.
systemctl restart nginx
systemctl restart php-fpm
That’s it. Your LEMP server is ready to use.
By default official RHEL 7.0 or CentOS 7.0 repositories doesn’t provide any binary package for PhpMyAdmin Web Interface. If you are uncomfortable using MySQL command line to manage your database you can install PhpMyAdmin package by enabling CentOS 7.0 rpmforge repositories using the following command.
After enabling rpmforge repository, next install PhpMyAdmin.

Enable RPMForge Repository
15. Next configure PhpMyAdmin to allow connections from remote hosts by editing phpmyadmin.conf file, located on Apache conf.d directory, commenting the following lines.
Use a # and comment this lines.

Allow Remote PhpMyAdmin Access
16. To be able to login to PhpMyAdmin Web interface using cookie authentication method add a blowfish string to phpmyadmin config.inc.php file like in the screenshot below using the generate a secret string, restart Apache Web service and direct your browser to the URL address http://server_IP/phpmyadmin/.
session_start() error display
vi /etc/php-fpm.d/www.conf
find "php_value[session.save_path] = /var/lib/php/session"
quit;
chown change 소유권 확인후 수정
ls -al /var/lib/php
chown -R root:nginx session
'NginX' 카테고리의 다른 글
| Nginx 컴파일 설치 Source Compile - 1.NginX 컴파일 , Centos7 서버에 (0) | 2015.09.17 |
|---|